Blog
The Ultimate Email Automation Checklist: 27 Steps for Flawless Workflows
Follow this 27-step email automation checklist to build flawless workflows that nurture leads, engage customers, and drive revenue. Covers strategy, testing,

> TL;DR: Email automation is more than just setting up a welcome series. A comprehensive email automation checklist should cover everything from initial strategy and list hygiene to detailed workflow setup, rigorous testing, and ongoing optimization. This guide provides a 27-step checklist for marketers to build, launch, and maintain effective, deliverability-focused email automations that drive results.
Email automation is a powerful tool for nurturing leads, engaging customers, and driving revenue on autopilot. But without a systematic approach, it’s easy to end up with a tangled mess of workflows that underperform, annoy subscribers, and even damage your sender reputation. A detailed checklist is the best way to ensure you cover all your bases.
This guide provides the ultimate email automation checklist, broken down into key phases. Whether you're launching your first automation or refining a complex sequence, follow these steps to build a flawless, effective, and scalable email automation machine.
I. Strategy & Planning (Steps 1-6)
Before you write a single email or touch a workflow builder, you need a solid strategy. This phase is about defining your goals, understanding your audience, and ensuring your data is clean and ready.
1. Define the Goal of Your Automation
What is this specific automation supposed to achieve? Be specific. Instead of “nurture leads,” aim for goals like “Convert trial users to paid customers within 14 days” or “Re-engage subscribers who haven’t opened an email in 90 days.”
2. Identify Your Target Audience & Segment
Who is this automation for? Use your segmentation capabilities to define the target audience precisely. This could be based on:
- Behavior: Visited a specific product page, abandoned a cart, downloaded a lead magnet.
- Demographics: Job title, location, company size.
- Lifecycle Stage: New subscriber, active customer, lapsed user.
3. Clean and Validate Your Entry List
A successful automation starts with a healthy list. Before launching, run your target segment through an email validation service. This is non-negotiable.
- Why it matters: Sending to invalid emails (typos, fakes, or old addresses) leads to high bounce rates, which is a major red flag for mailbox providers like Gmail and Outlook. It directly harms your sender reputation and inbox placement.
- Action: Use a service like Sendgrove’s built-in validation to remove invalid, risky, and unknown emails from your list before they enter the automation.
4. Map the Customer Journey & Triggers
How does a subscriber enter this automation, what path do they take, and how do they exit? Sketch it out.
- Entry Trigger: What action or event starts the workflow? (e.g., form submission, tag added, purchase made).
- Workflow Logic: What are the steps? (e.g., wait 1 day, send email #1, if/else split based on a click).
- Exit Conditions: What removes a subscriber from the automation? (e.g., they make a purchase, click a specific link, or complete the sequence).
5. Choose Your Key Performance Indicators (KPIs)
How will you measure success? Define your primary and secondary KPIs. Common automation KPIs include:
- Open Rate
- Click-Through Rate (CTR)
- Conversion Rate (e.g., purchases, sign-ups)
- Revenue per Email
- Unsubscribe Rate
6. Comply with Regulations (GDPR, CAN-SPAM)
Ensure your automation complies with all relevant email marketing laws.
- Consent: Confirm you have explicit consent (like from a double opt-in) to email this segment.
- Unsubscribe Link: Every email must have a clear and easy-to-find unsubscribe link.
- Physical Address: Include your company’s physical mailing address in the footer.
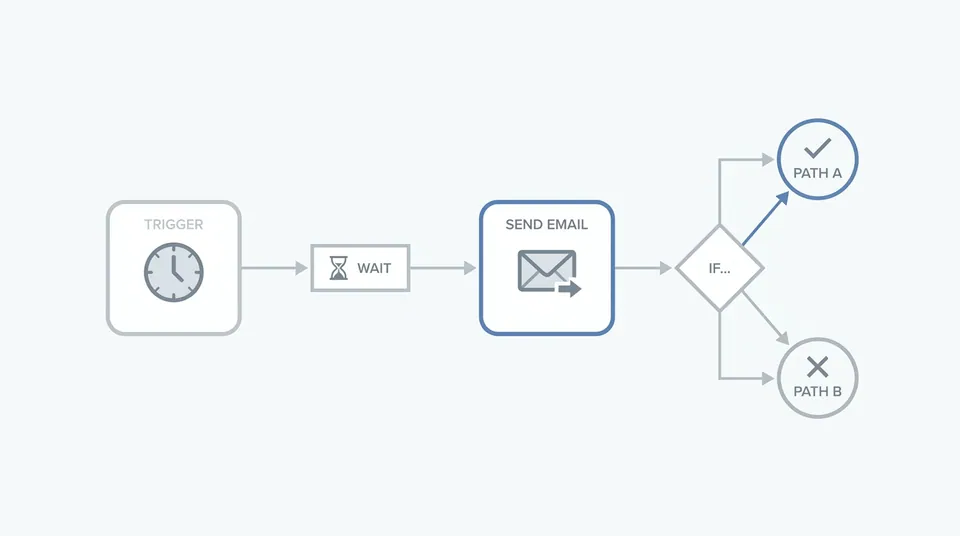
II. Workflow & Content (Steps 7-15)\n\nWith a solid plan, it’s time to build the workflow and create the content.\n\n### 7. Build the Automation Workflow\n\nIn your email marketing platform, visually construct the workflow you mapped out. At Sendgrove, this is done in our intuitive automation builder.\n\n!Email Automation Workflow Diagram\n\n Add your entry trigger.\n Drag and drop actions like “Send Email,” “Wait,” “If/Else,” and “Add Tag.”\n Connect the steps to create your desired sequence.\n\n### 8. Write Compelling, On-Brand Email Copy\n\nWrite the copy for each email in the sequence. Each email should have a single, clear purpose that aligns with the overall goal.\n\n Subject Lines: Make them clear, intriguing, and relevant. A/B test them!\n Body Copy: Keep it concise, scannable, and focused on the reader’s needs.\n Call to Action (CTA): Every email needs a clear, compelling CTA button or link.\n\n### 9. Design Clean, On-Brand Email Templates\n\nUse a clean, mobile-responsive email template.\n\n Branding: Ensure your logo, colors, and fonts are consistent.\n Simplicity: Avoid clutter. Use plenty of white space.\n Images: Use high-quality, relevant images, but don’t rely on them to convey your message (many users have images disabled by default).\n\n### 10. Personalize Your Content\n\nUse personalization tags to make your emails more relevant and engaging. Go beyond just the first name.\n\n Merge Tags: {{firstname}}, {{companyname}}\n Dynamic Content: Show or hide entire content blocks based on subscriber data (e.g., showing different product recommendations based on past purchases).\n\n### 11. Set Up Time Delays and Scheduling\n\nConfigure the timing of your emails.\n\n Wait Steps: Use “Wait” actions to control the cadence (e.g., “Wait 2 days” between emails).\n Time Windows: Restrict sending to certain days or times (e.g., only send on weekdays between 9 AM and 5 PM in the subscriber’s timezone).\n\n### 12. Configure UTM Tracking\n\nAdd UTM parameters to all links in your emails. This allows you to track the performance of your automation in Google Analytics and other analytics tools.\n\n utmsource: sendgrove\n utmmedium: email\n utmcampaign: welcome-series-2026\n\n### 13. Set Up a Plain-Text Version\n\nEvery HTML email should have a plain-text alternative. This is crucial for deliverability and accessibility. Most modern email builders, including Sendgrove's, generate this for you automatically.\n\n### 14. Add to an Existing Nurture Sequence (Optional)\n\nIf this automation is part of a larger customer journey, make sure it connects logically with other workflows. For example, after a welcome series, you might add subscribers to your main newsletter segment.\n\n### 15. Configure Goal Tracking in Your ESP\n\nIf your email service provider supports it, define a “Goal” for your automation (e.g., a subscriber visits the pricing page or a tag is added). This makes it easy to see your automation’s conversion rate at a glance.\n\n## III. Testing & QA (Steps 16-21)
Never launch an automation without thoroughly testing it. A small mistake can lead to a major brand embarrassment or a deliverability nightmare.
16. Proofread All Copy and Subject Lines
Read every word out loud. Check for typos, grammatical errors, and awkward phrasing. Use a tool like Grammarly or have a colleague review it.
17. Test on Multiple Email Clients and Devices
Emails render differently across clients (Gmail, Outlook, Apple Mail) and devices (desktop, mobile). Use a service like Litmus or Email on Acid to preview your emails and ensure they look great everywhere.
18. Verify All Links and UTM Tags
Click every single link in every email. Ensure they go to the correct destination and that your UTM tags are accurate.
19. Test the Automation Logic with a Seed List
Create a test list of email addresses (your own and your colleagues’). Run the entire automation on this seed list.
- Verify Triggers: Does the automation start when it’s supposed to?
- Check Delays: Are the time delays between emails correct?
- Test Conditionals: If you have if/else logic, test all possible paths.
- Confirm Exits: Do subscribers exit the workflow when they meet the exit conditions?
20. Check Personalization and Dynamic Content
When testing with your seed list, use contacts with different data points to verify that your personalization and dynamic content are working as expected. Does the fallback value for {{first_name}} work correctly if a contact doesn’t have a name?
21. Review Sender Name, Reply-To, and Preview Text
Check these crucial details for each email in the sequence:
- From Name: Is it recognizable and trustworthy?
- Reply-To Address: Where do replies go? Is someone monitoring that inbox?
- Preview Text: Is the preview text optimized to encourage opens?
IV. Launch & Optimization (Steps 22-27)
Your automation is tested and ready. It’s time to go live and start gathering data.
22. Activate the Automation
Flip the switch! Activate your workflow. For the first few hours, keep a close eye on it to ensure subscribers are entering as expected and no immediate issues arise.
23. Monitor Performance Against KPIs
Let the automation run for a while to gather statistically significant data (at least 1-2 weeks, depending on volume). Then, compare the results against the KPIs you defined in Step 5.
24. Analyze Drop-off Points
Where are subscribers exiting the funnel? If you have a high unsubscribe rate on a specific email, review its content and value proposition. If a large number of people are finishing the sequence without converting, you may need to add more steps or strengthen your CTA.
25. Run A/B Tests
Continuously look for ways to improve performance. A/B testing is the most scientific way to do this.
- Subject Lines: The easiest and often most impactful element to test.
- CTAs: Test different button copy, colors, and placements.
- Content: Test long copy vs. short copy, or different value propositions.
26. Segment Based on Engagement
Use the data from your automation to refine your segmentation. For example, you could tag subscribers who click a specific link, then follow up with a more targeted offer.
27. Periodically Review and Refresh
Don’t just “set it and forget it.” Review your automation’s performance quarterly. Refresh the content, update old statistics, and look for new optimization opportunities to keep it relevant and effective.
Frequently Asked Questions (FAQ)
What is the main benefit of email automation?
The main benefit is efficiency. Automation handles repetitive, manual tasks like sending welcome emails, nurturing leads, and re-engaging subscribers, freeing up marketers to focus on strategy and content creation. It also ensures timely and consistent communication with your audience.
How often should I email my automation sequence?
This depends on the goal and the audience. For a welcome series, daily emails for the first few days might be appropriate. For a long-term nurture sequence, once a week is a more common cadence. The key is to provide value in every email and monitor your engagement metrics to avoid fatiguing your list.
Can email automation hurt my deliverability?
Yes, if done poorly. Sending a high volume of unvalidated, un-targeted, or low-engagement emails can damage your sender reputation. A proper automation strategy, as outlined in this checklist, includes list hygiene, engagement monitoring, and respecting subscriber preferences, all of which improve deliverability.
What's the difference between automation and a regular newsletter?
A newsletter is a one-to-many broadcast sent to a whole list or segment at a specific time. An automation is a sequence of emails triggered by an individual subscriber's action or data. It's a one-to-one communication journey that's personalized and happens on the subscriber's timeline, not the marketer's.
What are some essential automations every business should have?
- Welcome Series: To greet new subscribers and introduce your brand.
- Cart Abandonment: To recover lost sales from online shoppers.
- Lead Nurturing: To educate prospects and guide them toward a purchase.
- Customer Onboarding: To help new customers succeed with your product.
- Re-engagement/Win-back: To reactivate dormant subscribers before they are removed from your list.
Conclusion: Your Blueprint for Flawless Automation
A checklist isn’t just about ticking boxes; it’s about creating a repeatable system for excellence. By following these 27 steps, you move from reactive, ad-hoc emails to proactive, strategic automation.
Ready to put this checklist into action? Sendgrove’s powerful automation builder and built-in email validation make it easy to build and manage effective workflows. Start your free trial today and see the difference a systematic approach can make.